
This post may contain affiliate links. Please read our disclosure policy.
If making nigiri at home sounds like it requires sushi chef training, this platter is your loophole. Instead of hand shaping rice for every single piece, you press one slab of seasoned sushi rice into a sheet pan, chill it, flip it out, and top it in thirds – spicy shrimp, salmon, and bluefin tuna. Cut it into bites and every piece looks like it came off a nigiri platter at a restaurant. Nobody needs to know the rice never touched your hands.
I have been hosting a lot lately, and this is one of my favorite ways to serve dinner. Three different bites, three different toppings, and one pan doing all the work.
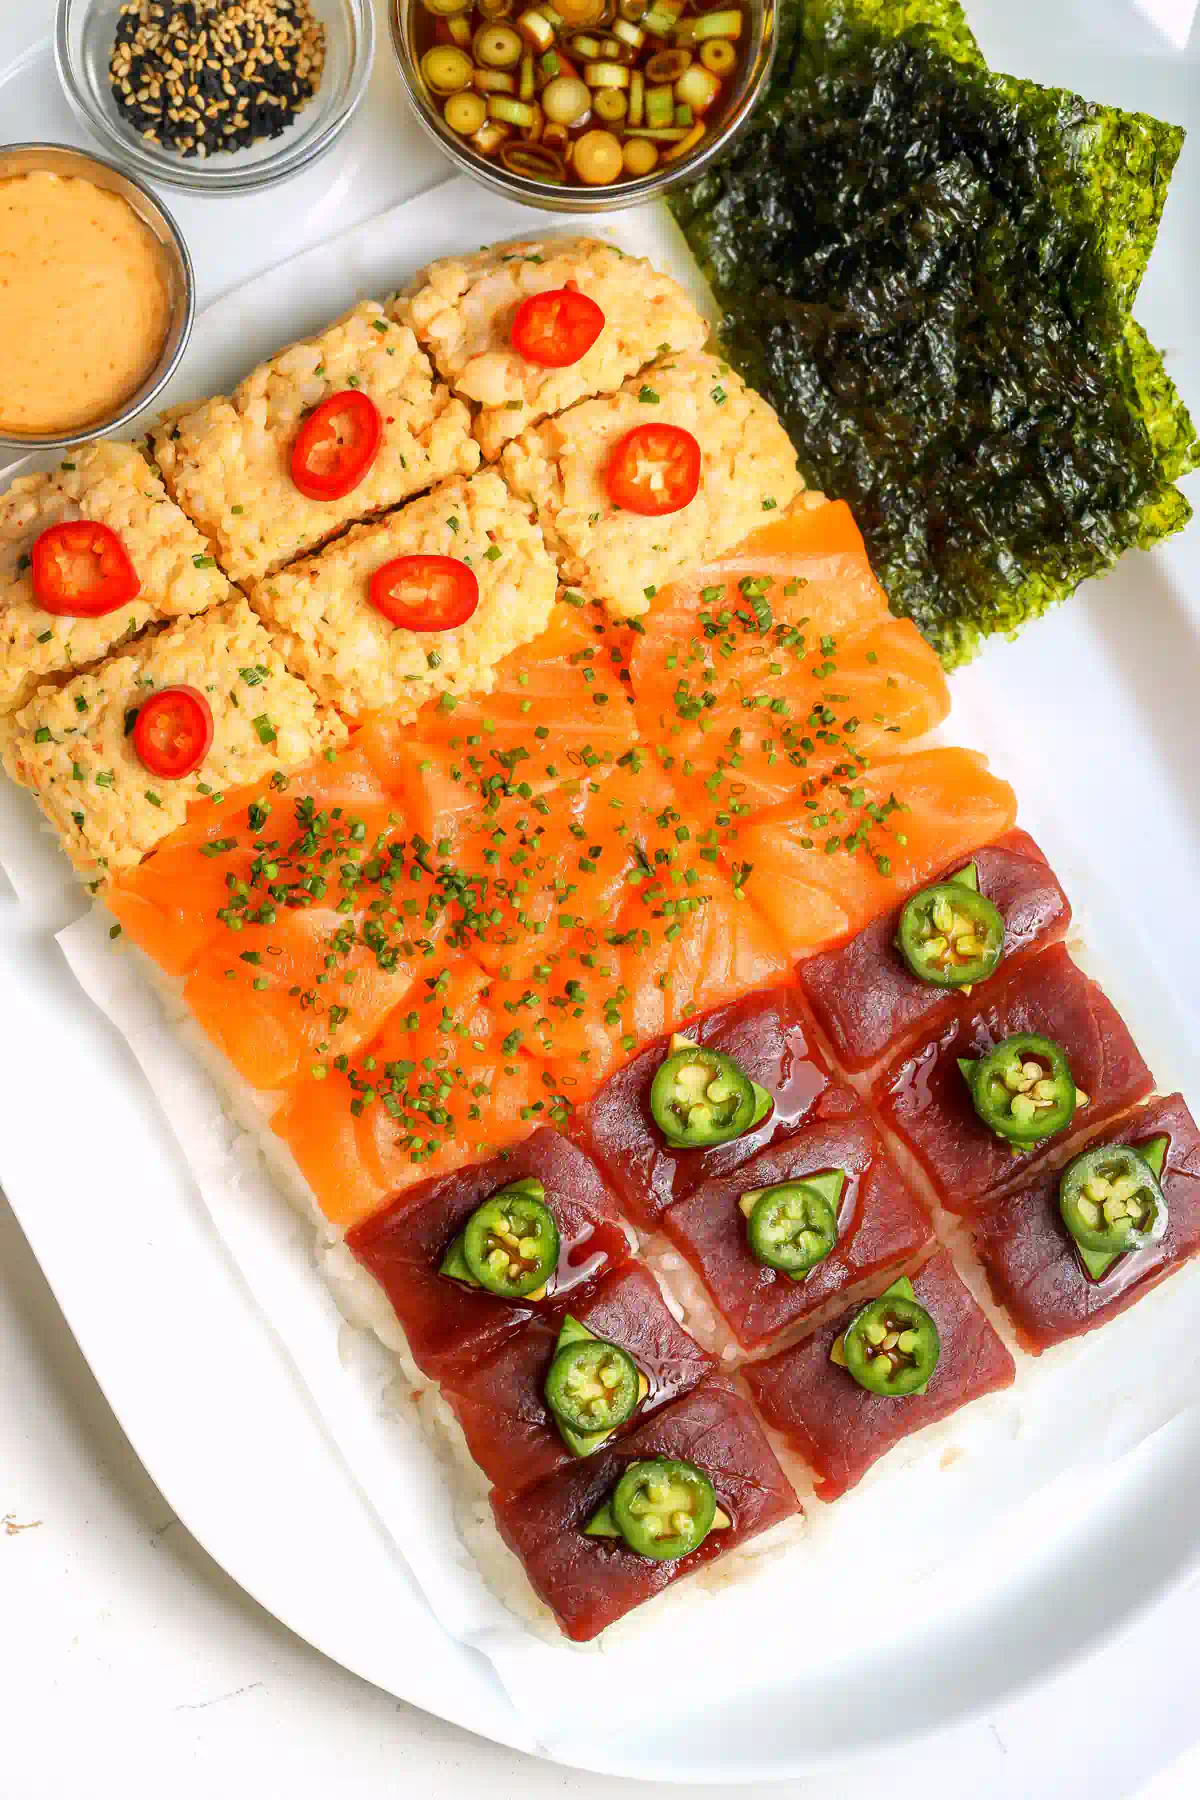
Table of Contents
What Is Nigiri?
Nigiri is a style of sushi where a small pressed mound of vinegared rice is topped with a slice of fish or other seafood, usually raw. The name comes from the Japanese word for “to grip,” because each piece is traditionally shaped by hand. It’s what you picture when you picture sushi. Clean slice of fish on rice, no roll, no nori wrapper required.
That hand shaping is the part that takes sushi chefs years to master, and it’s exactly the part this recipe skips. Pressing the rice as one slab gives you the same bite without the technique.
Nigiri vs Sashimi
Nigiri is fish served on a pressed bite of seasoned rice. Sashimi is just the fish, thin slices of raw seafood with no rice at all. If there’s rice under it, it’s nigiri; if it’s fish alone, it’s sashimi. This platter is nigiri-style because every single bite sits on that pressed sushi rice. If you’re more of a sashimi table, my Sushi Board covers that craving.
How to Make Nigiri Without Shaping Each Piece
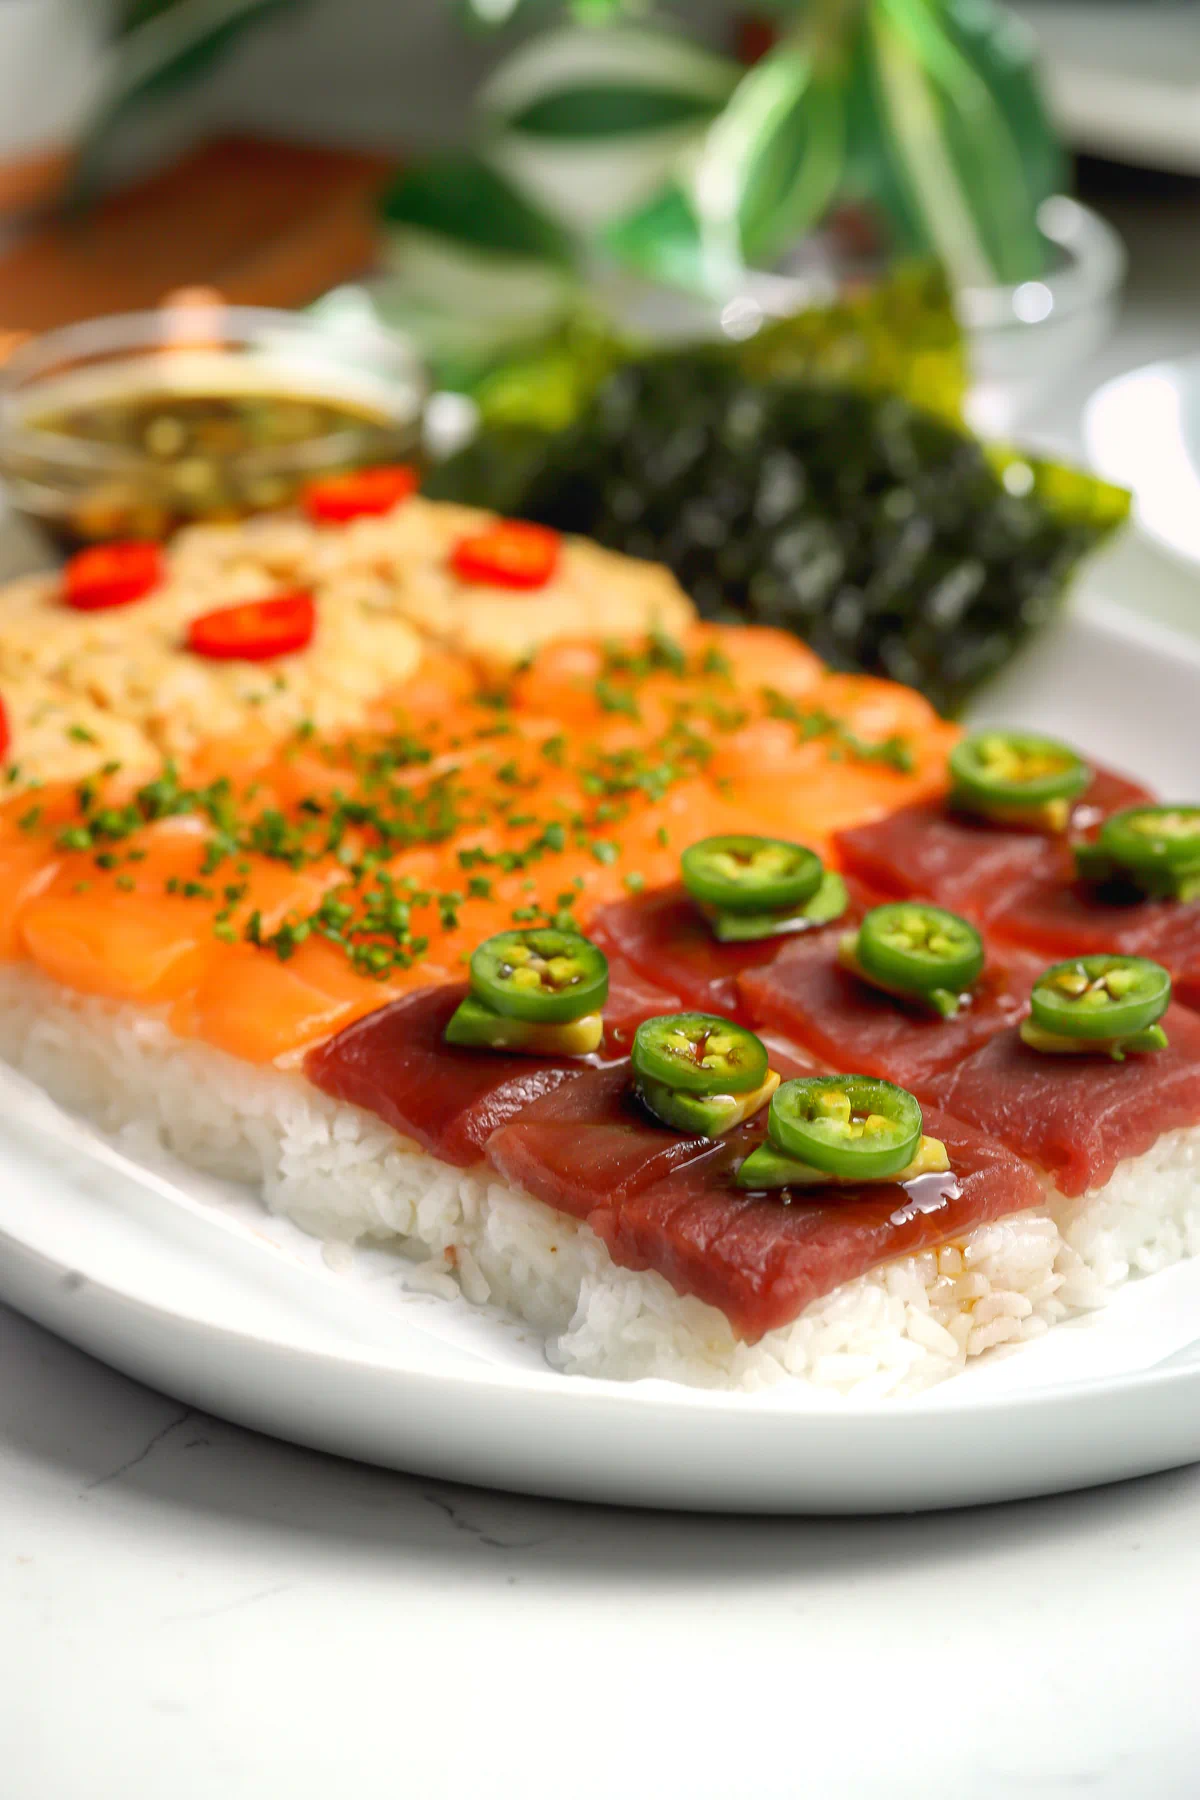
The whole trick is one quarter sheet pan. Season the cooked rice, press it firmly into a pan with parchment, cover it, weigh it down (the bag of rice you just opened works perfectly), and freeze it for 20 to 30 minutes until it’s firm enough to hold a clean cut. Flip it out, lay your toppings over it in three sections, and slice the whole thing into bites. The rows of toppings become your cutting guide. That’s it, restaurant nigiri geometry, zero hand shaping.
The Nigiri Toppings
Spicy Shrimp Nigiri
Boiled jumbo shrimp minced fine and folded into a spicy mayo with sriracha, sesame oil, and chives. It’s creamy, hot, and the one cooked topping on the platter, which makes it the move for anyone at your table who isn’t ready for raw fish. Topped with fresno pepper rounds.
Salmon Nigiri
Sushi-grade salmon sliced thin and laid in rows. Buttery, rich, and the crowd favorite every time. A shower of chives on top is all it needs.
Tuna Nigiri
Sushi-grade bluefin, deep red and meaty. Each bite gets a jalapeño slice, a little avocado, and a drizzle of homemade eel sauce, which is exactly as good as it sounds.
Your Sushi-Grade Fish Guide
Here’s the part that makes this platter beginner friendly: only two of the three toppings are raw. The shrimp is fully cooked, so you’re really just sourcing two pieces of sushi-grade fish.
Where to Buy It
Ask your fish counter directly whether the salmon and tuna have been handled for eating raw. A good fishmonger knows the question and answers it without blinking. The fish should look bright and glossy with no dry edges, and it should smell like the ocean, not like fish. Locally I get mine at AJ’s. If sushi-grade fish is hard to find near you, Catalina Offshore Products, Yama Seafood, and Riviera Seafood Club all ship overnight on ice, and one box covers both fish.
Safety and Handling
Follow the FDA’s seafood safety guidance and a few house rules. Keep the fish wrapped tight in the coldest spot of the fridge and use it within 24 hours of buying or thawing. Slice it cold, assemble right before serving, and don’t leave the platter out longer than 2 hours, 1 hour if it’s warm. Anyone pregnant or immunocompromised sticks to the spicy shrimp bites, which is the beauty of having a cooked section built in.
Tips for Making the Nigiri Platter
- Press the rice like you mean it and weigh it down. A loosely packed slab crumbles when you cut it. The plastic wrap plus a heavy bag on top while it chills is what makes clean bites possible.
- Freeze the fish for a few minutes before slicing. Slightly firm fish gives you those thin, clean nigiri slices.Oil your knife. A lightly oiled sharp knife glides through the rice slab without dragging the toppings.
- Make the sauces ahead. The eel sauce, spicy mayo, and scallion soy can all be done the day before. Slice fish and assemble day of, right before serving.
Ingredient Swaps
The Fish: Swap the salmon or bluefin for any sushi-grade fish you love. Yellowtail and albacore both work beautifully.
Crab: Swap the boiled shrimp for lump crab and the spicy section becomes crab nigiri bites. Same spicy mayo, same method.
Peppers: Jalapeño, fresno, and serrano are interchangeable here. Seed them for less heat or skip them entirely.
Japanese Mayo: Regular mayo works; add a splash of rice vinegar and a pinch of sugar to fake the Kewpie flavor. Vegenaise if you’re dairy-free.
How to Serve
This platter is dinner, so set the night up around it. Pour a Salty Vinegartini to start, briny and ice cold is exactly what raw fish wants next to it. Spicy Salmon Crispy Rice makes the perfect appetizer while the platter comes together, a Sesame Handheld Salad covers the fresh and crunchy side of the table, and warm Amaretto Peaches close it out.
And if you’re going full raw bar, serve this next to my Sushi Board and my Crispy Rice Tartare Flight and accept that nobody is leaving early.


Want to save this recipe to your collection?
Frequently Asked Questions
Nigiri sushi is a slice of seafood, usually raw, served on top of a small pressed piece of vinegared sushi rice. Unlike rolls, there’s no nori wrapping it together, just rice and topping.
With your hands or chopsticks, either is correct. If you’re dipping, turn the bite so the fish touches the soy sauce, not the rice . The rice soaks up too much and falls apart.
The rice slab and all three sauces can be made the day before. Slice the fish and assemble right before serving. The fish starts losing its color and silky texture after about 30 minutes out of the fridge.
A short or medium grain sushi rice. I used Nishiki premium grade medium grain for this one, and Calrose works just as well. Long grain rice won’t hold together.

Equipment
- rice cooker or pot
- quarter sheet pan
- parchment paper
- plastic wrap
- saucepan
- Mixing bowls
- 4 ramekins
- pot
- Sharp knife
- serving platter
Ingredients
Sushi Rice
- 2 cups sushi rice
- 1 kombu strip, optional
- 1 pinch salt
- 2 tsp sugar
- 3 tbsp rice vinegar
Eel Sauce
- 1/4 cup soy sauce or tamari
- 1/4 cup sugar
- 1/4 cup rice vinegar
Spicy Mayo
- 1/3 cup japanese mayo
- 3 tbsp sriracha
- 1 tsp sesame oil
- 1 tsp soy sauce or tamari
- 1/2 tsp sugar
- 2 tbsp chives, chopped
Scallion Soy Sauce
- 1/4 cup soy sauce
- 1/2 large lemon, juiced
- 1 tbsp rice vinegar
- 1 tsp agave syrup
- 2 scallions, sliced
Seafood
- 6-7 jumbo shrimp
- 6 oz sushi-grade salmon
- 6 oz sushi-grade bluefin tuna
Toppings
- 1 fresno pepper, sliced
- 1 tbsp chives, chopped
- 1 jalapeño, sliced
- 1/2 avocado, cut into small triangles
- sesame seeds, half black and half toasted
- toasted nori pieces
Instructions
- Make the Sushi Rice: Rinse the rice until the water runs clear. Cook in a rice cooker according to instructions with the kombu and salt. Stir the sugar and rice vinegar together in a small bowl until dissolved, then fold into the cooked rice.
- Press and Chill: Line a quarter sheet pan with parchment paper. Spoon in the rice and press it into a firm, even layer. Cover with plastic wrap, weigh it down (a bag of rice works well), and freeze for 20 to 30 minutes until firm.
- Make the Eel Sauce: Add the soy sauce, sugar, and rice vinegar to a saucepan and simmer until the sauce coats the back of a spoon, 5 to 7 minutes after it begins simmering. Cool in the fridge or an ice bath.
- Make the Spicy Mayo: Mix the japanese mayo, sriracha, sesame oil, soy sauce, sugar, and chives in a large bowl. Set aside 2 tablespoons in a ramekin for serving. Reserve the rest for the shrimp.
- Make the Scallion Soy Sauce: Mix the soy sauce, lemon juice, rice vinegar, agave, and scallions in a ramekin.
- Prepare the Seafood: Bring a pot of water to a boil. Cook the shrimp for 2 to 3 minutes, until bright pink. Mince very small and fold into the bowl of spicy mayo. Chill the salmon and tuna in the freezer for a few minutes, then slice each into 9 thin pieces.
- Unmold the Rice: Remove the weight and plastic wrap. Lay a sheet of parchment on a cutting board, invert the pan onto it, and lift the pan away. Peel off the pan parchment and transfer the rice slab to a serving platter.
- Top and Cut: Spread the spicy shrimp evenly over one third of the rice. Arrange the salmon slices in rows over the second third and the tuna over the last third. With an oiled knife, cut into bite-size pieces following the rows, about 6 spicy shrimp bites and 9 each of salmon and tuna, or cut to the size you prefer.
- Garnish and Serve: Top the spicy shrimp bites with fresno slices, the salmon with chives, and the tuna with jalapeño, avocado, and a drizzle of eel sauce. Serve immediately with the spicy mayo, eel sauce, scallion soy sauce, sesame seeds, and nori.
Kitchen Cam
Nutrition
Nutrition information is automatically calculated, so should only be used as an approximation.


My family loved this!
I’m so glad you guys loved it!